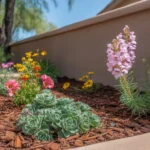
Composting is a fantastic way to reduce waste and nourish your garden soil in Gilbert. With our hot, dry climate, compost helps improve moisture retention and soil health. Proper preparation is key to having an efficient composting system that transforms your kitchen scraps and yard waste into “black gold” for your plants. Here’s how to get set up for composting success in Gilbert.
Choose the Right Composting Method
The first step is deciding which composting method works best for your space and lifestyle in Gilbert. The most common options are:
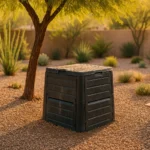
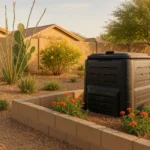
- Compost bins or tumblers: Enclosed containers that keep compost tidy and speed up decomposition. Great for small yards or HOA areas.
- Open compost piles: Simple piles or pits right in your yard. Ideal if you have a large property or lots of yard waste.
- Worm composting: Using worm bins to break down kitchen scraps. Perfect for Gilbert apartments or homes with limited outdoor space.
Consider factors like how much waste you generate, your available space, and how quickly you want finished compost. Bins and tumblers are the most common choice for Gilbert’s suburban yards. They keep everything contained while still allowing plenty of oxygen flow.
If you live in an HOA neighborhood, check your CC&Rs first. Some associations have rules about placement and style of compost systems. Discreet compost tumblers are usually the best bet to stay in compliance.
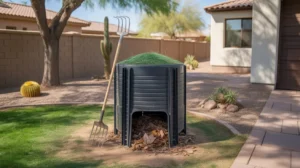
Find the Ideal Compost Location

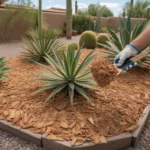
Location is everything when setting up your Gilbert compost station. You want an area that’s convenient to access but not too close to your home or patio. Decomposition does produce some odors, so pick a spot downwind from outdoor living areas.
The ideal composting spot has the following:
- Part sun/part shade. Some daily sun exposure helps heat up the pile to speed decomposition. But too much Gilbert sun can dry it out.
- Good drainage. Avoid low spots where water collects or the pile could get waterlogged and smelly.
- Access to water. Your pile will need occasional moisture, so being near a hose is helpful. But not so close that irrigation spray hits it regularly.
- Flat, level ground. Keeps everything contained and makes turning the pile easier.
One pro tip for Gilbert composters: take advantage of natural shade from trees or block walls to protect your pile from intense afternoon sun. Fruit trees are an especially smart spot – they’ll love the nutrient boost from the compost.
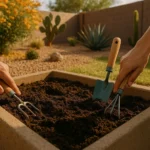
Gather Your Composting Materials
Once you have a bin and location ready, it’s time to start collecting materials. Aim for a balance of “green” and “brown” items:
- Greens (nitrogen-rich): Kitchen fruit/veggie scraps, coffee grounds, grass clippings, green leaves and garden prunings
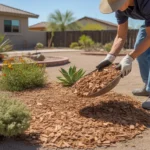
- Browns (carbon-rich): Dry leaves, wood chips, sawdust, newspaper, cardboard, straw
Avoid meat, dairy, oils, diseased plants, weeds with seeds, and pet waste which can attract critters and cause odors. Chop materials into small pieces to speed up decomposition in our arid Gilbert climate.
It’s smart to stockpile a stash of “browns”, especially in winter when dry material is scarce. Collect fall leaves, shred junk mail, and save wood shavings to have on hand. Aim for a “brown” to “green” ratio of about 3 to 1.
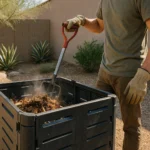
Kick-Start Your Compost Pile
To get your new pile cooking, start with a 6-inch layer of chunky “browns” like small twigs or wood chips. This creates air pockets for drainage and oxygen. Then alternate layers of greens and browns, ending with a carbon layer on top. Lightly moisten the whole pile so it’s damp as a wrung-out sponge.
Your pile will start to heat up within a few days from all the microbial action. Use a compost thermometer to monitor the temperature – it should reach 130-150°F at the center. Give it a mix every 7-10 days to distribute air and moisture. You can add a few shovelfuls of native Gilbert soil or finished compost to introduce local microbes.
With our warm temps, your Gilbert compost should be ready to use in about 2-4 months. You’ll know it’s finished when it’s dark, crumbly, and smells earthy. Use it to enrich garden beds, potted plants, or as a nutritious mulch around trees and shrubs.
Troubleshooting Common Compost Issues
Composting is pretty straightforward once you get a system going. But you might run into a few hiccups along the way. Here’s how to solve common compost problems:
- Smelly pile: Usually means it’s too wet or compacted. Mix in more dry brown material and turn it to add oxygen. Make sure it’s not sitting in a puddle.
- Pile isn’t heating up: The pile might be too small or dry. Aim for at least a 3×3′ pile size. Add more green materials and a light sprinkle of water while turning.
- Attracting critters: Avoid adding meat, dairy, and oils. Use a secured bin. Bury food scraps in the center of the pile. Top with a layer of brown materials.
- Decomposing slowly: Gilbert’s dry heat can really slow things down. Keep your pile shaded during summer. Chop materials finely. Monitor and adjust moisture. Be patient – desert composting is slower than in rainy climates!
Enjoy the Fruits of Your Composting Labor
Composting is an easy, eco-friendly way to level up your Gilbert garden and reduce your carbon footprint at the same time. With a little prep work, you’ll be churning out nutritious compost to keep your yard thriving through our intense summers. Your plants will thank you!
By starting with the right setup and materials, you’ll set yourself up for composting success. Pretty soon, you’ll have a steady supply of “black gold” to enrich your Gilbert soil. So pick a shady spot, grab your pitchfork, and start composting!