Spring is the perfect time to start planning and planting your Mesa garden. Whether you’re dreaming of vibrant flowers or a bountiful vegetable harvest, starting your plants from seed is a rewarding and cost-effective way to kick off the growing season. In this guide, we’ll walk you through the essential steps for successfully starting seeds and nurturing them into healthy, blooming plants that will make your yard the envy of the neighborhood.

Timing is Everything
One of the most crucial aspects of seed starting is getting the timing right. In Mesa, the ideal time to start seeds indoors is typically 6-8 weeks before the last expected frost date, which usually falls around mid-March. This gives your seedlings plenty of time to grow strong and sturdy before being transplanted outdoors.
Keep in mind that not all plants have the same timing requirements. Some seeds, like poppies and sunflowers, can be sown directly in the ground after the last frost. Others, like tomatoes and peppers, benefit from a longer indoor growing period. Consult the seed packets or do some research on your specific plant varieties to determine the optimal starting time.
As Priya Shah, a local Mesa gardening expert, advises: “Pay close attention to the specific needs of each plant species. Some seeds need to be started earlier or later than others. Creating a planting calendar can help you stay organized and ensure your seeds are started at the right time for maximum success.”
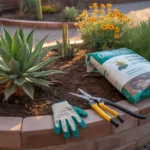
Choosing the Right Soil Mix
When it comes to seed starting, not just any old dirt will do. Seeds need a special, lightweight soil mix that allows for good drainage and air circulation. You can purchase pre-made seed starting mixes at your local garden center, or create your own by combining equal parts peat moss, vermiculite, and perlite.
Avoid using garden soil or potting mix, as these can be too heavy and may contain pathogens or weed seeds that can harm your delicate seedlings. Fill your seed trays or pots with the moistened soil mix, and you’re ready to start planting.
Sowing Seeds and Providing the Right Environment
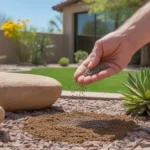
Once you have your timing and soil sorted out, it’s time to sow your seeds. Follow the planting depth and spacing instructions on the seed packet, as each variety has its own requirements. Generally, seeds should be planted at a depth of about twice their diameter.
After planting, your seeds will need a warm, humid environment to germinate. Most seeds germinate best at temperatures between 65-75°F (18-24°C). To maintain consistent moisture, cover your seed trays with plastic wrap or a humidity dome until the seeds sprout.
Place your seed trays in a warm, bright location, such as a sunny window or under grow lights. Keep the soil moist but not waterlogged, and be patient – some seeds can take several weeks to germinate.
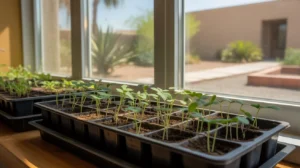
Caring for Your Seedlings
Once your seeds have sprouted, it’s important to provide them with the right care to ensure they grow into strong, healthy plants. Remove the plastic wrap or humidity dome to allow for air circulation, and continue to keep the soil moist.
As your seedlings grow, they’ll need plenty of light to prevent them from becoming leggy and weak. If you’re growing your seedlings indoors, place them under fluorescent grow lights for 14-16 hours per day. Keep the lights just a few inches above the seedlings, adjusting the height as they grow.
When your seedlings have developed their first set of true leaves, it’s time to start fertilizing. Use a half-strength, water-soluble fertilizer once a week to provide the nutrients your young plants need to thrive.
Hardening Off and Transplanting
Before your seedlings can be planted outdoors, they need to be gradually acclimated to the harsher conditions of the garden. This process, called hardening off, helps prevent transplant shock and ensures your seedlings are ready to face the elements.
About a week before transplanting, start hardening off your seedlings by placing them outdoors in a sheltered spot for a few hours each day. Gradually increase the amount of time they spend outside, and expose them to more direct sunlight and wind over the course of the week.
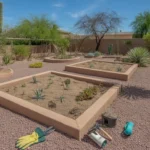
Once your seedlings are hardened off and the risk of frost has passed, it’s time to transplant them into your garden beds or containers. Be sure to space them according to their mature size, and water them well after planting.
With a little patience, care, and attention to detail, your spring seeds will soon blossom into a stunning array of flowers and vegetables that will make your Mesa yard the talk of the town. Happy planting!