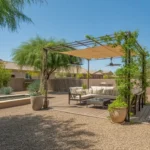
With summer temperatures soaring in the Southeast Valley, finding ways to create shade becomes a top priority for enjoying your outdoor spaces. One stylish and effective solution is installing DIY sun sails over your patio, pool, or backyard seating areas. With some careful planning and a weekend of work, you can transform your yard with custom shade that keeps you cool all season.
Understanding Sun Sail Basics
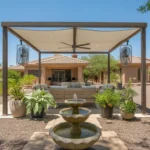
Sun sails, also known as shade sails, are large pieces of UV-resistant fabric stretched taut between anchor points to create a shaded area underneath. They come in a variety of shapes, sizes, and colors to suit different design preferences and yard layouts.
The key to a successful sun sail installation is creating the right amount of tension. The fabric should be pulled tight enough to minimize sagging and flapping in the wind, but not so tight that it puts excessive strain on the anchors or seams. Most sun sail kits include tensioning hardware to help you achieve the perfect tautness.
When selecting a sun sail, pay attention to the fabric’s UV rating, which indicates how much ultraviolet radiation it blocks. A higher rating means more protection from the sun’s harsh rays. For the intense Arizona sun, look for sails with a UV block of at least 90%.
Planning Your Sun Sail Layout

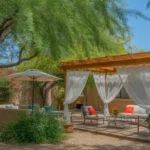
Before purchasing your sun sail, take some time to plan out the ideal placement in your yard. Consider factors like the angle of the sun at different times of day, the location of existing structures or trees, and the size of the area you want to shade.
Sketch out a few potential layouts, noting the approximate dimensions and shapes that would work best. Keep in mind that sun sails can be angled and overlapped to create more dynamic shading patterns. Triangular sails are the most common, but you can also find square, rectangular, and even hexagonal options.
When measuring for your sun sail, add an extra foot or two on each side to account for the fabric that will be taken up by the mounting hardware and tensioning. It’s better to have a sail that’s slightly too big than one that’s too small to provide adequate coverage.
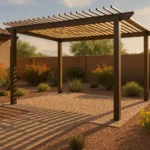
Choosing Anchor Points
Sun sails need sturdy anchor points to maintain proper tension and withstand wind gusts. The most common anchors are steel posts set in concrete footings, but you can also use existing structures like the eaves of your house, solid patio posts, or mature trees.
For steel post anchors, use pipes with a diameter of at least 2 inches and a length of 8-10 feet. Sink them at least 2 feet into the ground, with concrete footings for added stability. Make sure the posts are truly vertical using a level during installation.
If attaching to your house or another structure, consult with a professional to ensure the mounting points can handle the tension loads. Sun sails can exert significant force, especially in windy conditions, so it’s crucial to have robust connections.
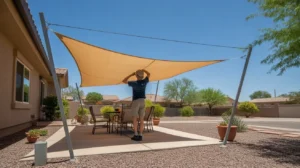
Installing Your Sun Sail
With your anchors in place, it’s time to mount the sun sail. Start by attaching the mounting hardware (D-rings or carabiners) to the sail’s corners according to the manufacturer’s instructions. Then connect the hardware to the anchors, leaving the sail loosely draped.
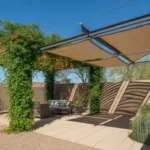
Next, begin tightening the turnbuckles or tensioners at each corner, working your way around the sail gradually. The goal is to create an even tension across the entire surface, with minimal creasing or sagging. Refer to your kit’s guidelines for the recommended tension level, usually expressed in pounds.
As you’re tensioning, step back periodically to assess the sail’s shape and position. Make adjustments as needed to achieve your desired aesthetic and shading coverage. Once you’re satisfied with the tension and layout, lock the tensioners in place and trim any excess cord.
Maintaining and Storing Your Sun Sail
To keep your sun sail looking great and functioning well for multiple seasons, give it regular care and maintenance. Clean the fabric annually using a soft brush, mild detergent, and warm water. Rinse thoroughly and allow the sail to air dry completely before storing or reinstalling.
Inspect the sail’s seams, corners, and hardware for signs of wear or damage. Make repairs promptly using fabric patches or replacement parts from the manufacturer. If you notice significant deterioration, it may be time to replace the sail entirely.
When the intense summer heat subsides, consider taking your sun sail down and storing it indoors for the winter. This will help prolong its lifespan and keep it looking vibrant for summers to come. Fold or roll the sail loosely and keep it in a cool, dry place until you’re ready to enjoy your shady oasis again next season.
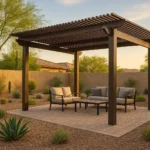
With DIY sun sails, you can create a cooler, more comfortable outdoor living space in your Southeast Valley backyard or patio. By providing targeted shade, they allow you to enjoy your yard even during the height of summer without breaking the bank on permanent structures. So grab your tools, round up some helpers, and start planning your custom sun sail design today!