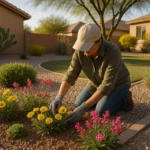
As Queen Creek’s winter temperatures gradually give way to spring warmth, experienced desert gardeners know that successful summer gardens begin long before the last frost. Starting seeds indoors gives your plants a crucial head start in our unique Arizona climate. With our intense summer heat arriving quickly, those extra weeks of growth can mean the difference between a bountiful harvest and struggling plants. I’ve spent years perfecting my indoor seed-starting routine here in Queen Creek, and I’m excited to share these techniques to help you create your own seedling nursery.
Why Start Seeds Indoors in Queen Creek?
Our Queen Creek growing season presents unique challenges and opportunities. Starting seeds indoors allows you to extend your growing season by 4-6 weeks, giving plants time to develop strong root systems before facing our intense desert conditions. This head start is particularly valuable for heat-sensitive vegetables like tomatoes, peppers, and eggplants that need time to mature before summer temperatures soar.
Indoor seed starting also provides complete control over early growing conditions. Young seedlings are protected from Queen Creek’s unpredictable spring weather, including late cold snaps, sudden downpours, and drying winds. You’ll also avoid common outdoor garden challenges like soil-borne diseases, pests, and weed competition during the vulnerable seedling stage.
Perhaps most satisfying is the significantly expanded plant selection available when starting from seed. While local nurseries offer quality transplants, they typically stock only a handful of varieties. By starting seeds indoors, you can choose from thousands of unique vegetable, herb, and flower varieties specifically suited to Queen Creek’s growing conditions or your personal preferences.
Timing Your Indoor Seed Starting in Queen Creek
Proper timing is critical for successful seed starting in our region. Most seeds should be started 6-8 weeks before our last expected frost date, which typically falls in mid-February for Queen Creek. This means beginning your indoor seed-starting process in late December through January for spring vegetables. For summer crops that can’t tolerate any frost, like tomatoes, peppers, and eggplants, aim to start seeds in early January for transplanting in mid-March when nighttime temperatures consistently stay above 50°F.
For quick-growing summer flowers like zinnias, sunflowers, and cosmos, you can start seeds indoors in February for early spring transplanting. Fall vegetable gardens benefit from indoor seed starting in July and August, giving cool-season crops like broccoli, kale, and lettuce protection during the last weeks of intense summer heat before transplanting in September.
I’ve found that creating a seed-starting calendar specific to Queen Creek helps tremendously. Consider the days to maturity listed on seed packets, then count backward from our typical planting dates. Remember that some seeds germinate quickly (lettuce, cucumbers) while others take longer (peppers, parsley), so adjust your starting dates accordingly.
Essential Supplies for Indoor Seed Starting
Creating a successful indoor growing environment requires some basic equipment. Start with containers that provide adequate drainage—seed-starting trays with individual cells work well, but you can also repurpose containers like yogurt cups or egg cartons (just remember to poke drainage holes). For larger seeds or those that don’t transplant easily, like cucumbers and squash, consider using biodegradable pots that can be planted directly into the garden.
Quality seed-starting mix is non-negotiable. Regular garden soil is too heavy and may contain pathogens, so invest in a sterile, lightweight seed-starting medium. I prefer mixes containing peat moss, vermiculite, and perlite, which provide excellent drainage while retaining enough moisture for germination. Many local Queen Creek garden centers carry specialized seed-starting mixes, or you can order online from reputable suppliers.
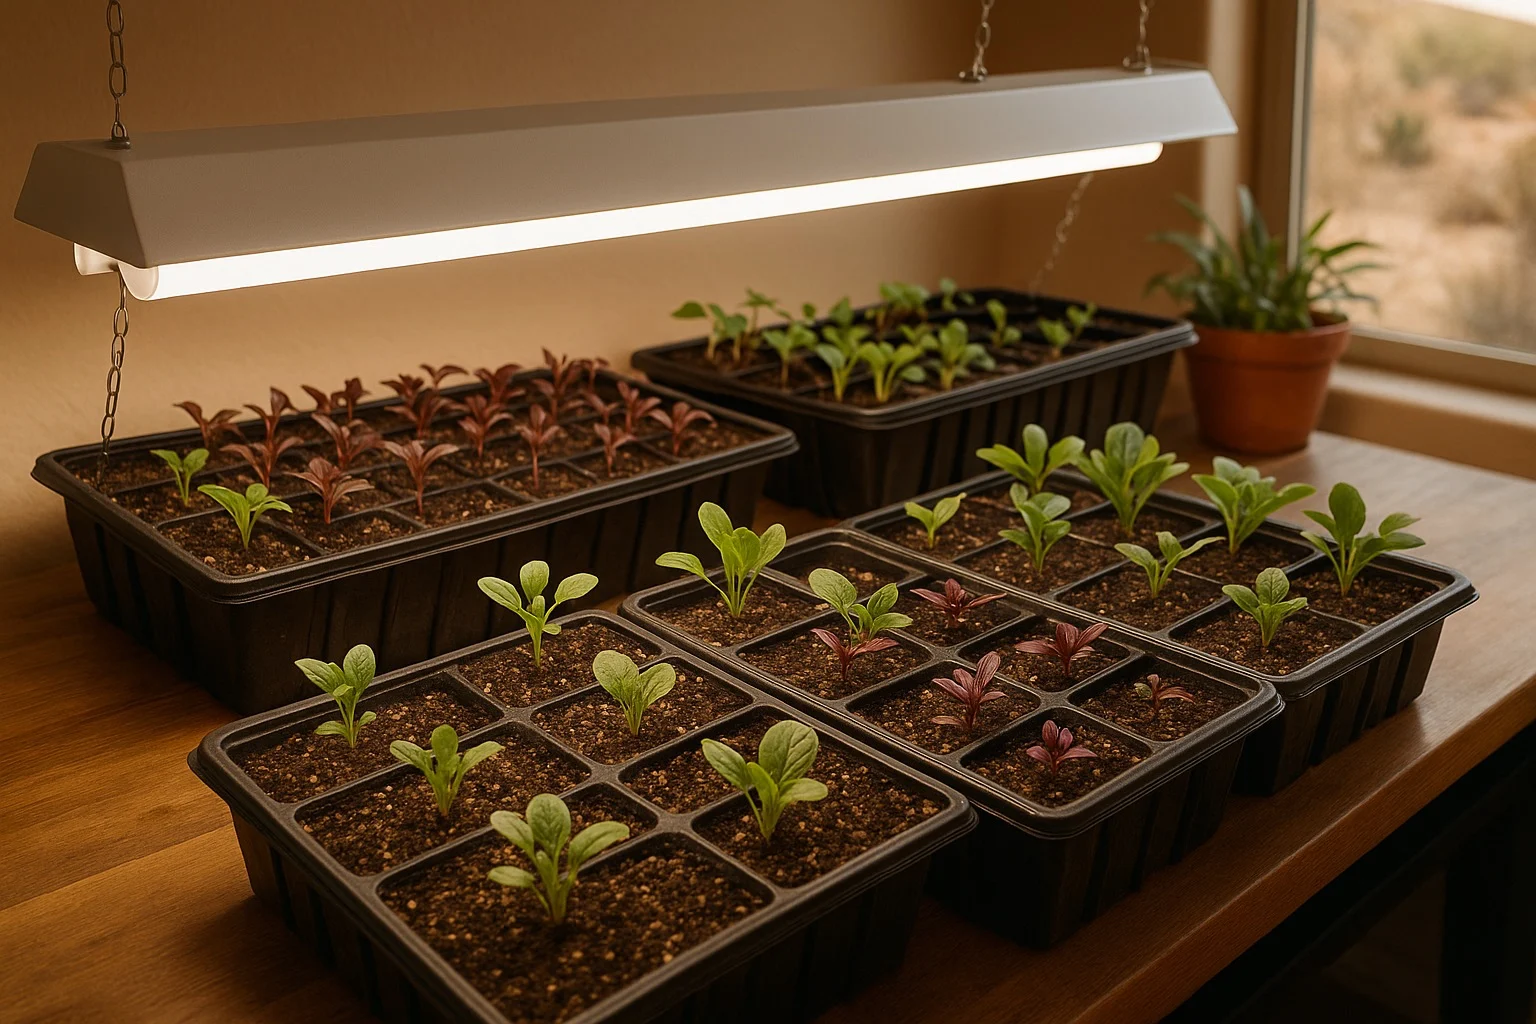
Adequate lighting is perhaps the most critical component of indoor seed starting. While a sunny south-facing window might seem sufficient, most Queen Creek homes don’t provide enough natural light to prevent seedlings from becoming leggy and weak. Inexpensive fluorescent shop lights or specialized LED grow lights suspended 2-3 inches above seedlings will ensure strong, compact growth. A simple timer can automate the process, providing the 14-16 hours of light most seedlings need daily.
Preparing and Planting Your Seeds
Before planting, organize your seeds according to starting dates and similar growing requirements. Some seeds benefit from pre-treatment techniques to improve germination. Large or hard-coated seeds like morning glories or sweet peas germinate better after soaking in water for 12-24 hours. Others, including many native Arizona wildflowers, require stratification (exposure to cold) to break dormancy. Check seed packets for specific instructions.
When you’re ready to plant, moisten your seed-starting mix thoroughly before filling containers. The mix should be damp but not soggy—about the consistency of a wrung-out sponge. Fill containers, then gently tamp down the surface. Plant seeds at the depth recommended on the packet (generally 2-3 times the seed’s width). Very fine seeds like lettuce or petunias should barely be covered, while larger seeds need deeper planting.
Label each container immediately with the plant name and planting date—this step is absolutely crucial and saves confusion later. After planting, mist the surface gently with water, cover containers with plastic domes or plastic wrap to maintain humidity, and place in a warm location. Most seeds germinate best at temperatures between 65-75°F, though heat-loving vegetables like peppers and eggplants prefer temperatures closer to 80°F. A seedling heat mat can provide bottom warmth to speed germination.
Daily Care for Emerging Seedlings
Check your seeds daily for germination and remove covers as soon as sprouts emerge. At this critical stage, seedlings need immediate access to bright light to prevent stretching (becoming “leggy”). Position grow lights just a few inches above seedlings, raising them as plants grow. In Queen Creek’s dry climate, maintaining adequate moisture is essential—check seedlings daily and water gently from below when the surface feels dry. I prefer bottom-watering by placing trays in shallow water for 10-15 minutes, which encourages stronger root development and prevents damping-off disease.
As true leaves develop (the second set of leaves after the initial cotyledons), begin fertilizing with a diluted liquid organic fertilizer at quarter-strength. I apply this weak solution once weekly, which provides enough nutrients without burning tender roots. Excessive fertilizer can create lush but weak growth that won’t transplant well to garden conditions.
Air circulation is particularly important in our dry climate. Use a small fan on its lowest setting to create gentle air movement around seedlings for a few hours each day. This strengthens stems and reduces the risk of fungal issues. As seedlings grow and begin to crowd their containers, thin them according to packet recommendations, keeping only the strongest plants.
Hardening Off for Queen Creek Conditions
The transition from protected indoor conditions to our harsh Queen Creek environment requires a gradual process called “hardening off.” Begin this process 7-10 days before your planned transplant date. Start by placing seedlings outdoors in a sheltered, shaded location for just 1-2 hours, then bring them back indoors. Each day, increase outdoor exposure time by 1-2 hours and gradually introduce more direct sunlight.
Our intense Arizona sun can quickly damage tender seedlings, so be particularly careful about sun exposure during hardening off. I’ve found that morning sun with afternoon shade works well for the first few days. Also, be mindful of our spring winds, which can quickly dehydrate seedlings—a sheltered patio or east-facing location often provides ideal conditions.
During the hardening off period, reduce watering slightly but don’t allow plants to wilt. This slight water stress helps prepare plants for garden conditions. By the end of the week, seedlings should be spending the full day outdoors and can even remain outside overnight if temperatures will stay above 50°F. This gradual toughening process dramatically improves transplant success rates in our challenging climate.
Transplanting to Your Queen Creek Garden
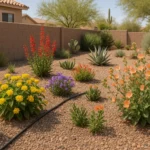
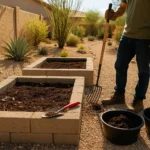
Choose a cloudy day or late afternoon for transplanting to minimize transplant shock. Prepare your garden beds in advance with compost and any amendments needed for your specific soil conditions. Queen Creek’s alkaline, clay-heavy soils often benefit from additional organic matter to improve drainage and nutrient availability. Water seedlings thoroughly before transplanting.
Dig holes slightly larger than the root ball of each seedling. If you’ve used biodegradable pots, you can plant them directly, but tear off any portion of the pot that extends above soil level to prevent wicking moisture away from roots. For seedlings in plastic containers, gently remove each plant, taking care not to disturb the root ball. Place seedlings at the same depth they grew in their containers (tomatoes are an exception—they can be planted deeper).
Water transplants immediately with a diluted seaweed or compost tea solution to reduce shock. Consider providing temporary shade for the first few days using shade cloth or improvised protection like overturned buckets during the hottest part of the day. In our Queen Creek climate, new transplants may need daily watering for the first week, gradually extending to deeper, less frequent irrigation as roots establish.
Troubleshooting Common Seed Starting Problems
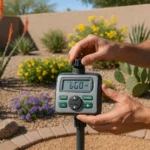
Even experienced gardeners encounter challenges when starting seeds indoors. Leggy, stretched seedlings typically indicate insufficient light—lower your grow lights or increase light duration. If seedlings fail to emerge, temperature may be the culprit. Most seeds germinate best between 65-75°F, though some need warmer or cooler conditions. A waterproof thermometer can help you monitor soil temperature.
Damping-off disease, where seedlings suddenly collapse at soil level, results from fungal pathogens encouraged by excessive moisture and poor air circulation. Prevent this common problem by using sterile seed-starting mix, avoiding overwatering, ensuring good air movement, and applying a light dusting of cinnamon (a natural fungicide) to the soil surface after planting.
Yellowing leaves often indicate nutrient deficiencies or pH imbalances. Start fertilizing with quarter-strength liquid organic fertilizer when true leaves appear. If seedlings develop purple undersides to leaves, they may be phosphorus deficient or experiencing temperatures that are too cold. For pale, weak growth, increase light intensity and ensure plants receive 14-16 hours of direct light daily.
Best Vegetables and Flowers for Indoor Seed Starting in Queen Creek
While most garden plants benefit from indoor starting, some particularly thrive with this head start in our Queen Creek climate. Tomatoes, peppers, and eggplants develop stronger root systems and produce earlier harvests when started indoors 8-10 weeks before transplanting. Summer squash, cucumbers, and melons can be started 3-4 weeks before transplanting to avoid our spring pest pressure during their vulnerable early stages.
For flowers, heat-loving varieties like zinnias, marigolds, cosmos, and sunflowers establish quickly when started indoors 4-6 weeks before our last frost. Native wildflowers like penstemons, desert marigold, and globe mallow also benefit from controlled indoor starting, though they require less pampering once established. Herbs including basil, parsley, and cilantro develop stronger root systems when started indoors, helping them withstand our summer heat.
Some plants, however, resist transplanting and perform better when direct-seeded in the garden. Root vegetables like carrots, beets, and radishes should be sown directly where they’ll grow. Quick-growing greens like lettuce and spinach also establish well from direct seeding once soil temperatures warm. Beans and peas, with their sensitive root systems, typically perform better when planted directly in garden soil after danger of frost has passed.
Creating an Indoor Seed Starting Schedule for Queen Creek
Developing a personalized seed-starting calendar helps organize your indoor growing efforts. For spring planting in Queen Creek, start heat-loving summer crops like tomatoes, peppers, and eggplants indoors in early January for mid-March transplanting. Quick-growing summer flowers can be started in February. Cool-season fall vegetables benefit from indoor starting in late July through August.
I recommend creating a simple spreadsheet or garden journal with columns for plant names, indoor starting dates, expected germination times, hardening off periods, and transplant dates. This system helps manage succession plantings and ensures you’re prepared with supplies when needed. Consider our unique Queen Creek climate patterns when planning—our early heat means getting a jump start on spring planting is particularly valuable.
Remember that seed starting isn’t a one-size-fits-all process. Each year brings slightly different weather patterns, and you’ll want to adjust your schedule based on current conditions and your previous experiences. Keeping detailed notes about what works well in your specific microclimate will help you refine your approach each season for increasingly successful gardens.